Research Resources : Images: Picture Manager
Quick Start Guide: Microsoft Office Picture Manager
The functionality and appearance of this program may differ slightly on your computer depending on the version of Office Suite you have installed. The version depicted here is Microsoft Office Suite 2007.
Note: This is a very straightforward, easy-to-use image editing and management tool. One drawback is that, by default, edited images are saved in the same format as the original image, even if you select the Save As option from the File menu. To change the file format, you must open the File menu, select Export, and then choose a new file type in the panel that appears.
Launching the Program
Open the Start menu > select All Programs > click on the Microsoft Office folder > within that folder, click on the Microsoft Office Tools folder > click on Microsoft Office Picture Manager to launch the program.
Editing Images
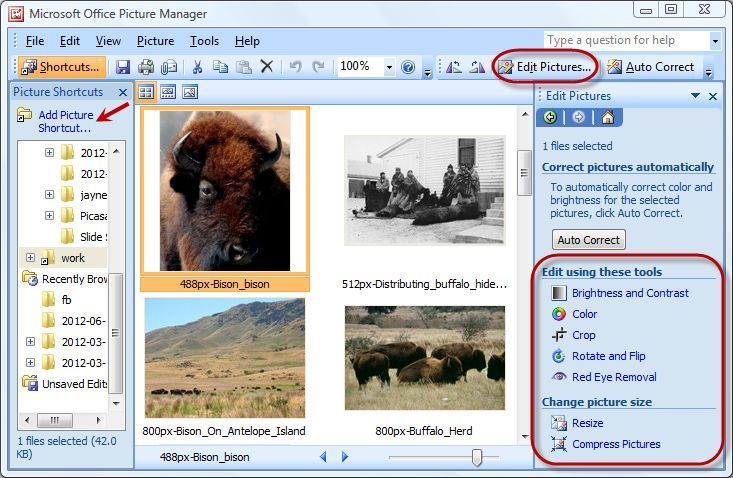
1. Click on Add Picture Shortcut to map a path to an image folder.
2. Select an image to edit. To edit multiple images, click on an image and press the Ctrl button while selecting additional images. To select a series of images, click on the first image in the series and then press the Shift button while selecting the last photo in the series.
3. Press Edit Pictures to access image editing tools.